Masterbuilt Turkey Fryer Manual PDF: A Comprehensive Guide
This guide details safe turkey frying with your Masterbuilt fryer, covering preparation, operation, troubleshooting, and essential safety features—refer to the PDF manual.
Understanding Your Masterbuilt Turkey Fryer
Your Masterbuilt turkey fryer offers a convenient and efficient way to cook a delicious turkey, but understanding its features is crucial for safe operation. This electric fryer simplifies the deep-frying process compared to traditional propane models, offering precise temperature control and consistent results. Before first use, thoroughly review the complete manual PDF available online. Familiarize yourself with all components, including the pot, basket, thermometer, and control panel.
Pay close attention to the fryer’s capacity – a maximum turkey size of 20lbs (9.07kgs) is strictly enforced for safety. Understanding these limitations and features will ensure a successful and enjoyable frying experience, delivering a perfectly cooked turkey for your holiday feast. Always prioritize safety and refer to the manual for detailed instructions.
Safety First: Essential Precautions
Prioritizing safety is paramount when operating your Masterbuilt turkey fryer. Always read and understand all instructions in the manual PDF before use. Ensure the fryer is placed on a level, non-combustible surface outdoors, away from buildings and flammable materials. Never leave the fryer unattended during operation.
Be mindful of the electrical cord length to avoid tripping hazards and prevent strain on the circuit. Avoid operating other appliances on the same circuit to minimize the risk of tripping the breaker. Maximum turkey size is 20lbs (9.07kgs) – exceeding this limit is dangerous; Watch safety videos on Masterbuilt’s website for visual guidance and always disconnect the fryer when not in use.
Key Components of the Fryer
Your Masterbuilt turkey fryer consists of several crucial components for safe and efficient operation. These include the fryer pot, designed to hold the oil and turkey; the control panel, featuring temperature settings; and the heating element, responsible for maintaining oil temperature.
A wood chip tray is included for optional smoke flavor, requiring pre-soaked wood chips. The lifting hook facilitates safe turkey lowering and removal. The power cord connects the fryer to a grounded electrical outlet. Familiarize yourself with each part as detailed in the manual PDF, understanding their function and proper usage for optimal performance and longevity of your fryer.

Preparing for the Fry
Proper turkey preparation is vital for safety and flavor; this includes complete thawing, removing giblets, brining/seasoning, and optional wood chip soaking.
Thawing the Turkey: A Critical Step
Ensuring your turkey is completely thawed is paramount for safe and even cooking when using your Masterbuilt fryer. A partially frozen turkey can cause dangerous splattering of hot oil, posing a significant safety hazard.
The recommended thawing method is refrigeration. Allow approximately 24 hours of thawing time for every 4-5 pounds of turkey weight. For example, a 16-pound turkey will require roughly four days to thaw fully in the refrigerator.
Alternatively, you can thaw the turkey in cold water, changing the water every 30 minutes to maintain a consistently cold temperature. Calculate about 30 minutes of thawing time per pound using this method.
Never thaw a turkey at room temperature, as this encourages bacterial growth. Always verify the turkey is entirely free of ice crystals before proceeding with the frying process.
Turkey Preparation: Removing Giblets & Neck
Prior to frying, meticulous turkey preparation is crucial for safety and optimal results with your Masterbuilt fryer. Begin by removing the neck and giblet bag, typically found inside the turkey’s cavity. Pay close attention to ensure all parts are extracted, as these can harbor bacteria and affect the cooking process.
Carefully inspect both the neck and body cavities, running your fingers along the interior to confirm no remnants remain. Discard the giblets and neck, or reserve them for making gravy.
Pat the turkey dry, both inside and out, with paper towels. Excess moisture can cause dangerous splattering when the turkey is submerged in hot oil. A dry turkey promotes crispier skin and safer frying.
Brining and Seasoning Your Turkey
Enhance your turkey’s flavor and moisture content by brining before frying with your Masterbuilt unit. While optional, brining significantly improves the final product. A basic brine consists of water, salt, and sugar, with optional additions like herbs and spices. Submerge the turkey completely in the brine for 12-24 hours in a food-safe container, kept refrigerated.
After brining, thoroughly rinse the turkey and pat it completely dry. Prepare for seasoning by injecting the turkey with Butterball Marinade for added flavor and moisture.
Season the inside and outside generously with Butterball Turkey Seasoning, ensuring even coverage for a delicious, golden-brown finish.
Wood Chip Preparation (Optional)
For a delightful smoky flavor, consider adding wood chips during the frying process with your Masterbuilt turkey fryer. This step is entirely optional, allowing you to customize your turkey’s taste profile. If desired, pre-soak approximately 1 cup of wood chips in water for at least 30 minutes before frying.
Soaking ensures the wood chips smolder rather than burn, producing a clean, consistent smoke. Once soaked, carefully place the wood chips into the designated wood chip tray within the fryer unit.
This placement allows the heat to activate the chips, infusing the turkey with a rich, smoky aroma during cooking.
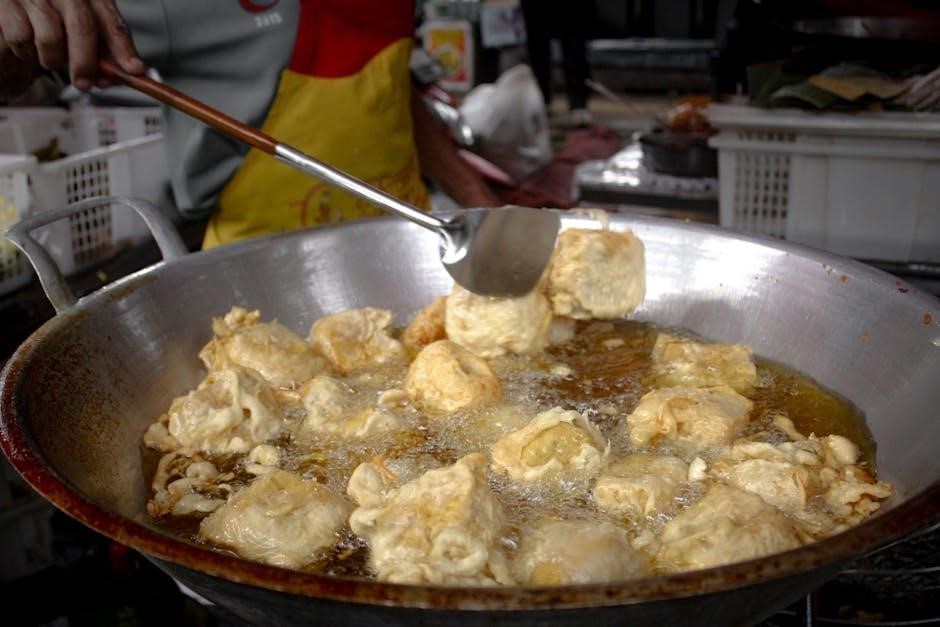
Operating the Masterbuilt Fryer
Begin by setting the control dial to HIGH, calculating cooking time at 10 minutes per pound, and consistently monitoring the turkey’s internal temperature.
Setting the Temperature Control
The Masterbuilt turkey fryer utilizes a straightforward temperature control system, typically featuring a dial or digital interface. Initially, set the control dial to the HIGH position to begin the preheating process, which can take up to 45 minutes.
Allow the oil to reach the desired frying temperature before carefully lowering the turkey into the fryer basket; Maintaining a consistent temperature is crucial for even cooking and achieving a crispy exterior.
Avoid frequent adjustments to the temperature control, as this can disrupt the cooking process. Regularly monitor the oil temperature using the built-in thermometer or a separate thermometer to ensure it remains within the optimal range for frying.
Calculating Cooking Time: Minutes Per Pound
A general guideline for calculating cooking time with your Masterbuilt turkey fryer is approximately 10 minutes per pound of turkey. However, this is an estimate, and actual cooking time can vary based on the turkey’s size, oil temperature, and ambient conditions.
It’s vital to use a reliable food thermometer to verify the internal temperature reaches 165°F-170°F (74°C-77°C) in the deepest part of the turkey breast.
Begin checking the internal temperature towards the end of the estimated cooking time. Do not rely solely on the minutes-per-pound calculation; always prioritize confirming doneness with a thermometer for food safety.
Monitoring the Turkey’s Internal Temperature
Accurate temperature monitoring is crucial for safe and delicious results when using your Masterbuilt turkey fryer. Insert a food thermometer into the deepest part of the turkey breast, avoiding bone contact, to ensure an accurate reading.
The turkey is considered fully cooked when the internal temperature consistently reaches 165°F-170°F (74°C-77°C).
Check the temperature in multiple locations to confirm even cooking. Consistent monitoring prevents undercooked or overcooked turkey, guaranteeing a safe and enjoyable meal. Refer to the manual for specific thermometer recommendations and best practices.
Using a Food Thermometer Correctly
For precise cooking, insert the food thermometer 2 inches into the deepest part of the turkey breast, ensuring it doesn’t touch bone. Bone contact can give a falsely high reading, leading to inaccurate assessment of doneness.
Digital thermometers provide quicker and more accurate readings than analog versions. Regularly calibrate your thermometer for optimal performance, following the manufacturer’s instructions.
Check the temperature in multiple spots – thigh and breast – to confirm even cooking. The target temperature is 165°F-170°F (74°C-77°C).
Troubleshooting & Maintenance
Address common fryer issues, clean thoroughly after each use, and store properly to ensure longevity and optimal performance—consult the manual for details.
Addressing Common Issues
Encountering problems with your Masterbuilt turkey fryer? The manual provides solutions for typical concerns. If the unit won’t heat, check the power cord and circuit breaker—avoid overloading circuits.
For uneven cooking, ensure the turkey is fully thawed and properly seasoned. If the temperature fluctuates, verify the control dial setting and ambient conditions.
Should oil splatter occur, immediately turn off the fryer and allow it to cool completely before addressing the issue. Always prioritize safety and refer to the manual’s detailed troubleshooting section before attempting repairs.

Contact Masterbuilt customer service at 1-800-489-1581 for further assistance if problems persist.
Cleaning Your Masterbuilt Fryer
Proper cleaning extends the life of your Masterbuilt turkey fryer. Always unplug the unit and allow it to cool completely before cleaning. Carefully dispose of used oil responsibly – never pour it down the drain.
Remove the pot and any accessories, washing them with warm, soapy water. Avoid abrasive cleaners that could damage the surfaces. The fryer housing can be wiped down with a damp cloth.
Ensure all components are thoroughly dry before reassembling and storing. Refer to the manual for specific cleaning instructions related to the heating element and temperature control.
Regular cleaning prevents buildup and ensures optimal performance for future frying endeavors.
Storing Your Fryer Properly
Correct storage safeguards your Masterbuilt turkey fryer for years of use. Ensure the unit is completely cool and dry before storing. Clean all components thoroughly, as detailed in the manual, to prevent corrosion and lingering odors.
Store the fryer in a cool, dry location, protected from the elements. Avoid storing it outdoors or in damp environments. Keep the power cord neatly coiled and secured to prevent damage.
Original packaging is ideal, but a sturdy box will suffice. Refer to the manual for specific storage recommendations regarding the pot and other accessories.
Proper storage ensures your fryer remains in optimal condition for your next holiday feast.

Safety Features & Warnings
Masterbuilt fryers include crucial safety features like a maximum 20lb turkey capacity and a short power cord—always consult the manual for warnings.
Maximum Turkey Size (20lbs/9.07kgs)
Adhering to the maximum turkey size of 20lbs (9.07kgs) is paramount for safe operation of your Masterbuilt fryer. Exceeding this weight limit can lead to several hazardous situations, including oil spillage and potential injury.
The fryer is engineered and tested specifically for turkeys within this weight range, ensuring stable operation and accurate cooking times. Attempting to fry a larger turkey compromises the unit’s stability and increases the risk of accidents.

Always verify the turkey’s weight before commencing the frying process. Refer to the complete manual PDF for detailed safety guidelines and instructions regarding turkey size limitations. Ignoring this warning voids any warranty and poses a significant safety risk.
Cord Length & Electrical Considerations
Your Masterbuilt turkey fryer utilizes a shorter power cord, a deliberate safety feature designed to minimize the risk of entanglement or accidental tripping during operation. Extension cords are generally discouraged due to potential hazards, but if absolutely necessary, use a heavy-duty, outdoor-rated extension cord with sufficient amperage.
Be mindful of the fryer’s electrical requirements and avoid overloading the circuit. Operating other high-wattage appliances on the same circuit can cause the breaker to trip.
Always ensure the outlet is properly grounded. Consult the complete manual PDF for detailed electrical specifications and safety precautions to prevent electrical shock or fire hazards.
Avoiding Circuit Breaker Tripping

To prevent your circuit breaker from tripping during turkey frying, it’s crucial to understand your fryer’s wattage and your home’s electrical capacity. Avoid operating the fryer on the same circuit as other high-wattage appliances like refrigerators, air conditioners, or space heaters.
Ensure the outlet is dedicated and properly grounded. A dedicated circuit minimizes the load and reduces the risk of overload.
Refer to the Masterbuilt fryer’s manual PDF for specific wattage information and electrical recommendations. Following these guidelines will ensure safe and uninterrupted operation during your holiday cooking.

Resources & Support
For assistance, contact Masterbuilt Customer Service at 1-800-489-1581, explore online safety videos, or find the complete manual PDF online.
Masterbuilt Customer Service Contact (1-800-489-1581)
Need direct assistance with your Masterbuilt Turkey Fryer? Don’t hesitate to reach out to their dedicated customer service team. You can connect with a knowledgeable representative by calling 1-800-489-1581.
This is the primary channel for assembly assistance, reporting missing or damaged parts, and addressing any concerns you may have regarding the fryer’s operation or safety features. The team is equipped to guide you through the manual, troubleshoot issues, and ensure a safe and enjoyable frying experience.
Remember to have your fryer’s model number and purchase date readily available when you call to expedite the support process. Masterbuilt prioritizes customer satisfaction and is committed to providing prompt and helpful assistance.
Online Safety Videos
Before operating your Masterbuilt Turkey Fryer, prioritize safety by watching the comprehensive instructional videos available on Masterbuilt’s official website. These videos visually demonstrate the correct setup, operation, and safety precautions essential for a successful and hazard-free frying experience.
They cover critical aspects like proper grounding, oil level monitoring, and safe turkey handling, reinforcing the information detailed in the owner’s manual.
Visual learning can significantly enhance your understanding of the fryer’s features and potential risks. Accessing these resources is a proactive step towards ensuring a delicious and, most importantly, safe holiday meal.
Finding the Complete Manual PDF
Accessing the complete Masterbuilt Turkey Fryer Manual PDF is crucial for detailed instructions and safety guidelines. While a quick start guide may be included, the full manual provides comprehensive information on all features, troubleshooting steps, and warranty details.
Typically, you can locate the PDF on the official Masterbuilt website, within the “Support” or “Downloads” section.
Searching online using keywords like “Masterbuilt Turkey Fryer Manual PDF” and your specific model number will also yield results.
Having the complete manual readily available ensures a safe and enjoyable frying experience.
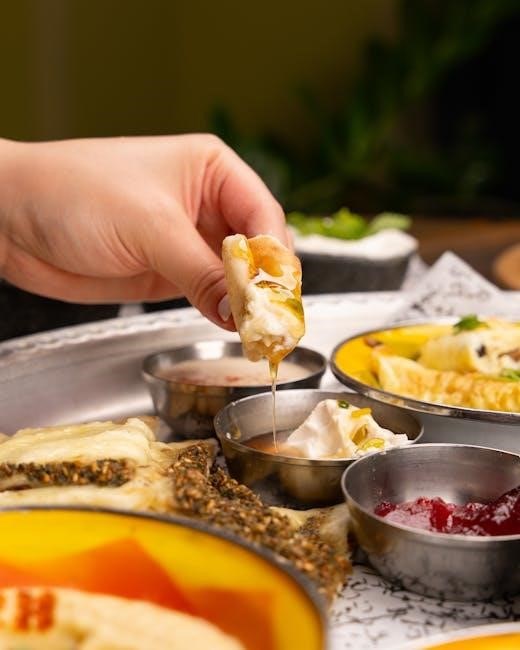
Beyond Turkey: Other Foods to Fry
Expand your culinary horizons! This fryer isn’t limited to turkey; explore frying chicken, fish, or even desserts for versatile cooking options.
Exploring Versatile Cooking Options
The Masterbuilt turkey fryer isn’t a one-trick pony! Beyond the Thanksgiving staple, this appliance unlocks a world of deep-fried possibilities; Consider golden-brown fried chicken, offering a crispy exterior and juicy interior – a family favorite. Seafood lovers can rejoice with perfectly fried fish, shrimp, or even calamari, achieving restaurant-quality results at home.
Don’t limit yourself to savory dishes; explore sweet treats like fried Oreos or apple rings for a delightful dessert. Remember to adjust cooking times and temperatures based on the food being fried, and always prioritize safety. The versatility of this fryer makes it a valuable addition to any kitchen, extending its usefulness far beyond the holiday season.
Electric Smoker Advantages
Electric smokers, like those often paired with Masterbuilt fryers for year-round cooking, offer significant advantages over traditional methods. They provide consistent temperatures with minimal effort, eliminating the need for constant monitoring and fuel adjustments. This ease of use makes them ideal for both beginners and experienced cooks.
Electric smokers deliver rich, smoky flavors without the complexities of charcoal or wood-burning. Their precise temperature control ensures perfectly cooked meats every time, and many models feature digital controls and timers for added convenience. They are also generally cleaner and safer than other smoking methods, making them a great choice for home use.
Holiday Grilling & Smoking Preparation
Preparing the ultimate Thanksgiving turkey, or any holiday feast, begins with meticulous planning and the right equipment. Ensure you have a completely thawed turkey, removing the neck and giblet bag before cooking. Pre-soaking wood chips (optional) adds delightful smoky flavor.
Gather essential seasonings like Butterball Turkey Seasoning and consider injecting the turkey with marinade for enhanced moisture and taste. Familiarize yourself with your Masterbuilt fryer’s manual, paying close attention to safety guidelines and cooking times. Having a reliable food thermometer is crucial for verifying internal temperature, aiming for 165F-170F.